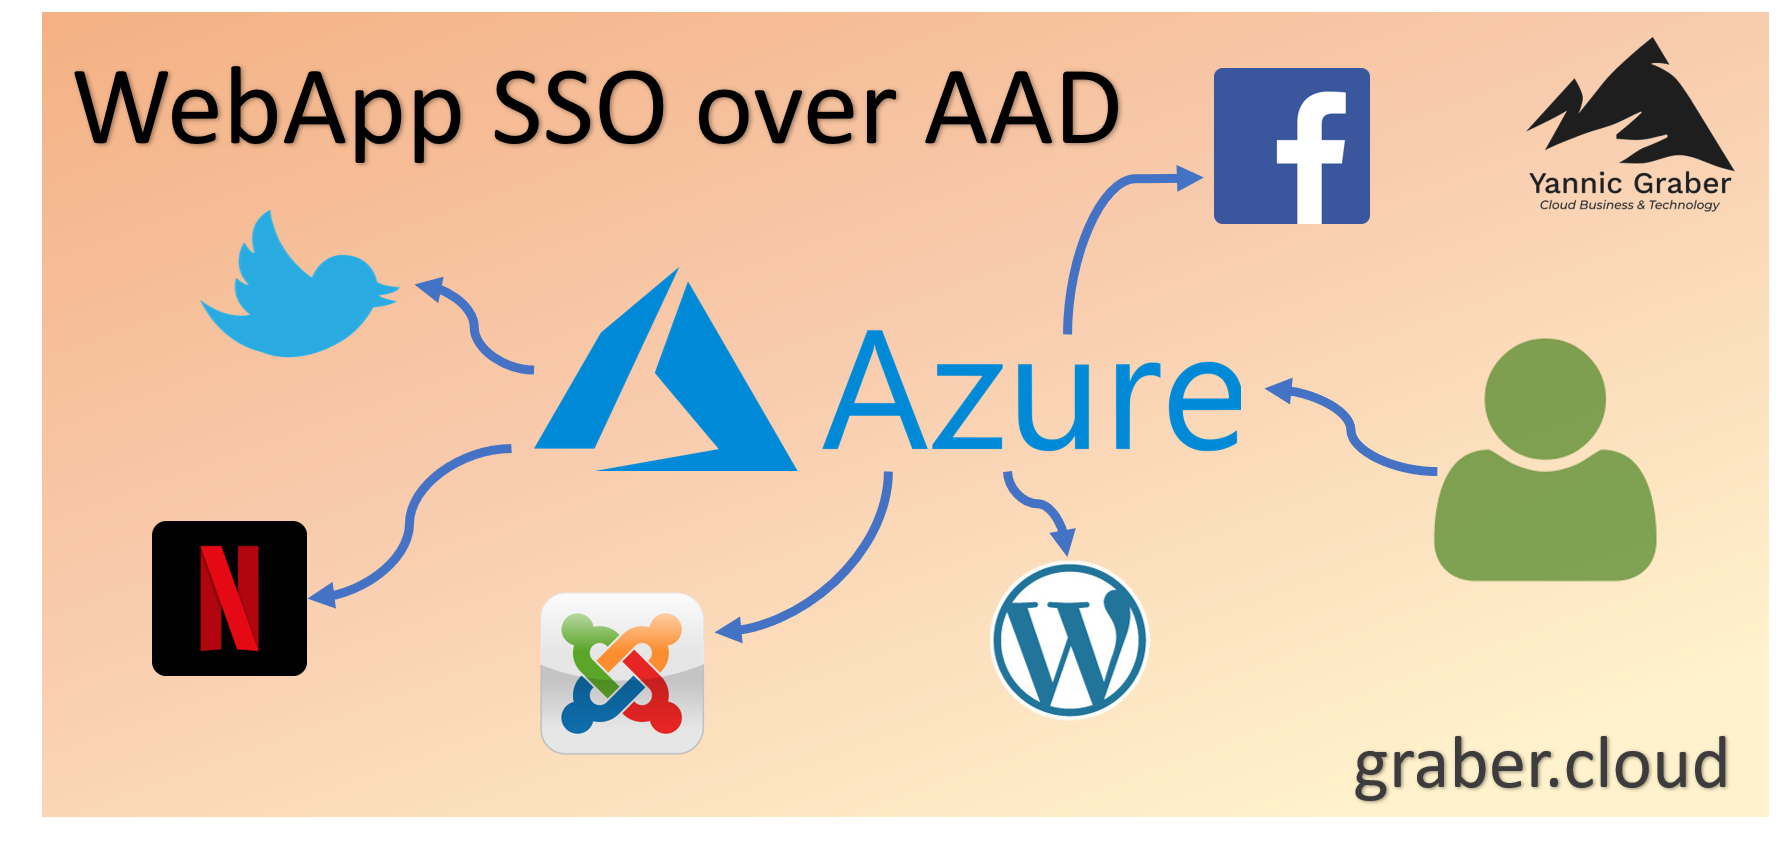
The digital world is changing and more and more cloud apps are being used. Both in private and business. If each of these web apps has its own authentication, chaos quickly reigns and a user must authenticate several times a day. It becomes especially inconvenient if a web app uses shared user credentials. If several users know this login credentials, security suffers, especially if one of the users leaves the company. Azure AD offers protection and security here, so that users do not need to know the login data when logging in to a 3rd-party web application. The following HowTo shows how Single sign-on (SSO) and security for Cloud Apps can be configured via Azure AD.
Initial situation
There is already an Azure Tenant with an Azure AD and the corresponding users. There is also a web application with a simple login form. In this case it is WordPress, more specifically the login at www.graber.cloud. Furthermore the user "yannic(at)graber.cloud" exists, for which the single sign-on is provided.
Registering the WebApp
In order for the Cloud App to be assigned to the user later, it must first be registered in Azure AD.
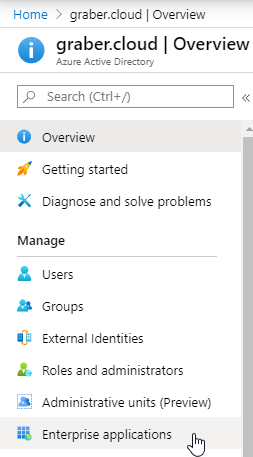
- To do this, select the "Azure Active Directory" and then "Enterprise Applications" in the Azure Portal.
- Then select "New application"", followed by "Non-gallery application".
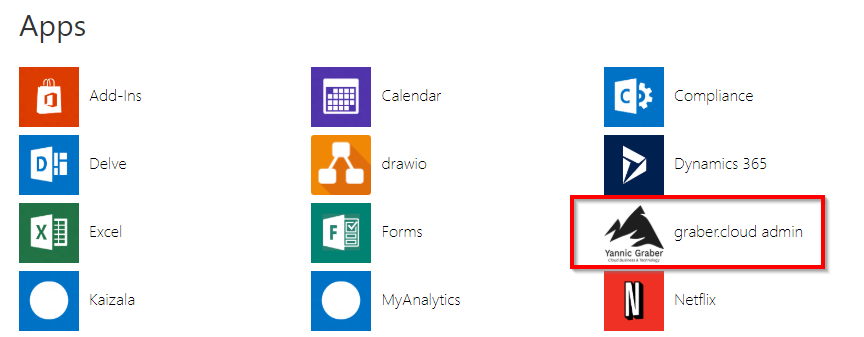
- In the next step you assign the name of the application. The WebApp then appears in Azure AD and in the user view. In this example "graber.cloud admin". With the button "Add" you confirm the name and define it.
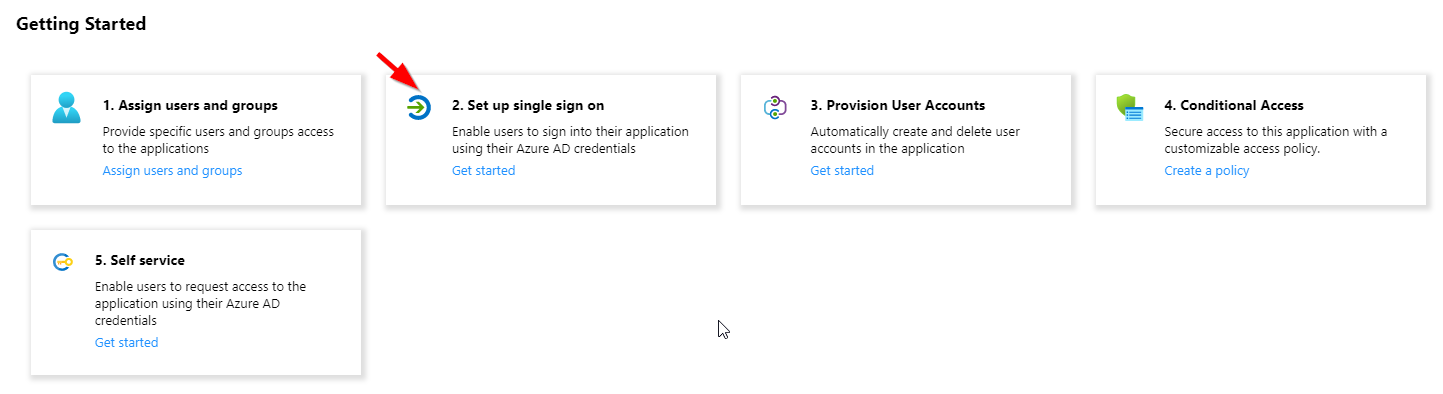
- You have successfully registered the app and the "Getting Started" overview appears.
Azure AD Configuration
Now that the WebApp is generally registered in Azure AD, you can continue with the configuration.
SSO over Azure AD
First you should directly set up the "Single sign-on" for the WebApp.
- Select in the overview "2 Set up single sign on".
- In the following selection select "Password-based" in this scenario.

- In the text field "Sign on URL" now insert the login URL of the desired WebApp and select "Save". This process takes a few minutes.
The WebApp login url is now successfully configured. In most cases Azure is able to find the login fields itself. This is also the case in this example. If this is not the case, you can also configure them manually. You can do this via "Single sign-on", "Use this option to try re-detecting the sign-in fields on the sign on URL above" followed by "Manually detect sign-in fields" and "Capture sign-in fields".
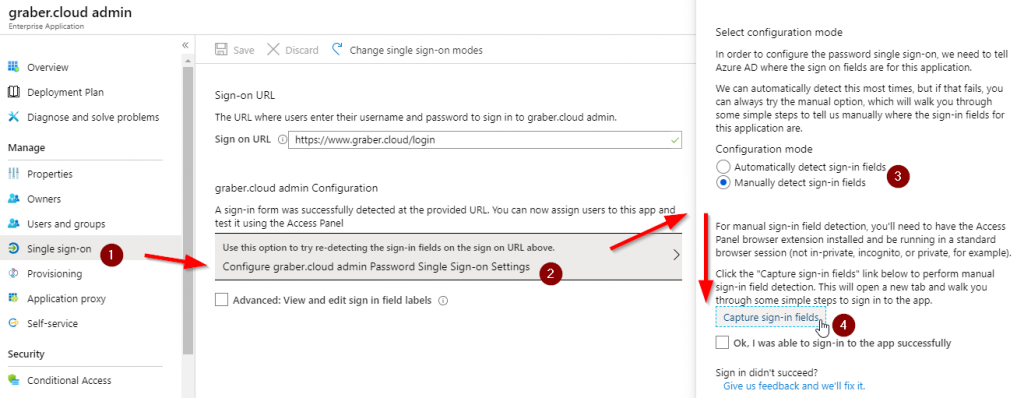
Attention: The login information is not yet stored. You will configure this in a later step. But first you have to adjust the appearance.
Add your logo
To ensure that the web app has a suitable appearance, you also store a suitable logo in Azure AD. Under "Properties" you can upload such a logo.
The WebApp will now appear with this logo on the user's screen, if the WebApp is assigned to them. This is exactly what you will do in the next step.
WebApp User Assignment
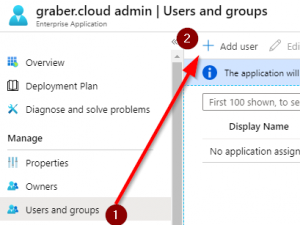
In the already registered WebApp or Enterprise Application you can now choose which users will see it.
- Select "User and groups" and then "Add user".
- Now select the desired user or users in the directory to which you want to grant access.
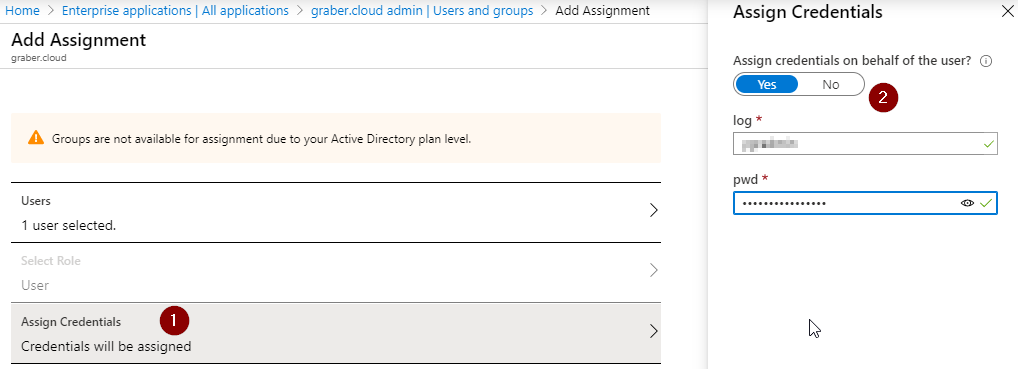
- Afterwards you can choose whether you want to provide the login data directly to the assignment, or whether the user has to provide it himself when logging in. Based on the existing scenario, you would like to provide these directly. So choose "Assign Credentials" and select "Yes" at "Assign credentials on behalf of the user?".
- Now add the login data in the form and save with "OK".
Congratulations, you have just completed the necessary configuration and can test it.
Configuration test
To test the configuration, simply log in with one of the authorized users on https://myapps.microsoft.com. In the list you will find the newly created and configured Azure AD WebApp.
If you have completed all previous steps correctly, you will be logged in automatically.
Sources:
https://docs.microsoft.com/en-us/azure/active-directory/manage-apps/add-non-gallery-app
https://docs.microsoft.com/en-us/azure/active-directory/manage-apps/configure-password-single-sign-on-non-gallery-applications