Azure Bastion is an Azure service that allows you to access your Azure VMs securely and centrally via the web portal. This allows you to enable your system administrators and system specialists to "work anywhere" without any security concerns. In this article I will not focus on the service itself, but rather on the steps necessary to plan and implement Azure Bastion.
Planning and preparation for Azure Bastion
Creating Azure Bastion is very easy. The most important thing, as so often, is to plan the use and implementation well. Accordingly, I would like to start with the preparation and planning. The following points should be taken into account when planning.
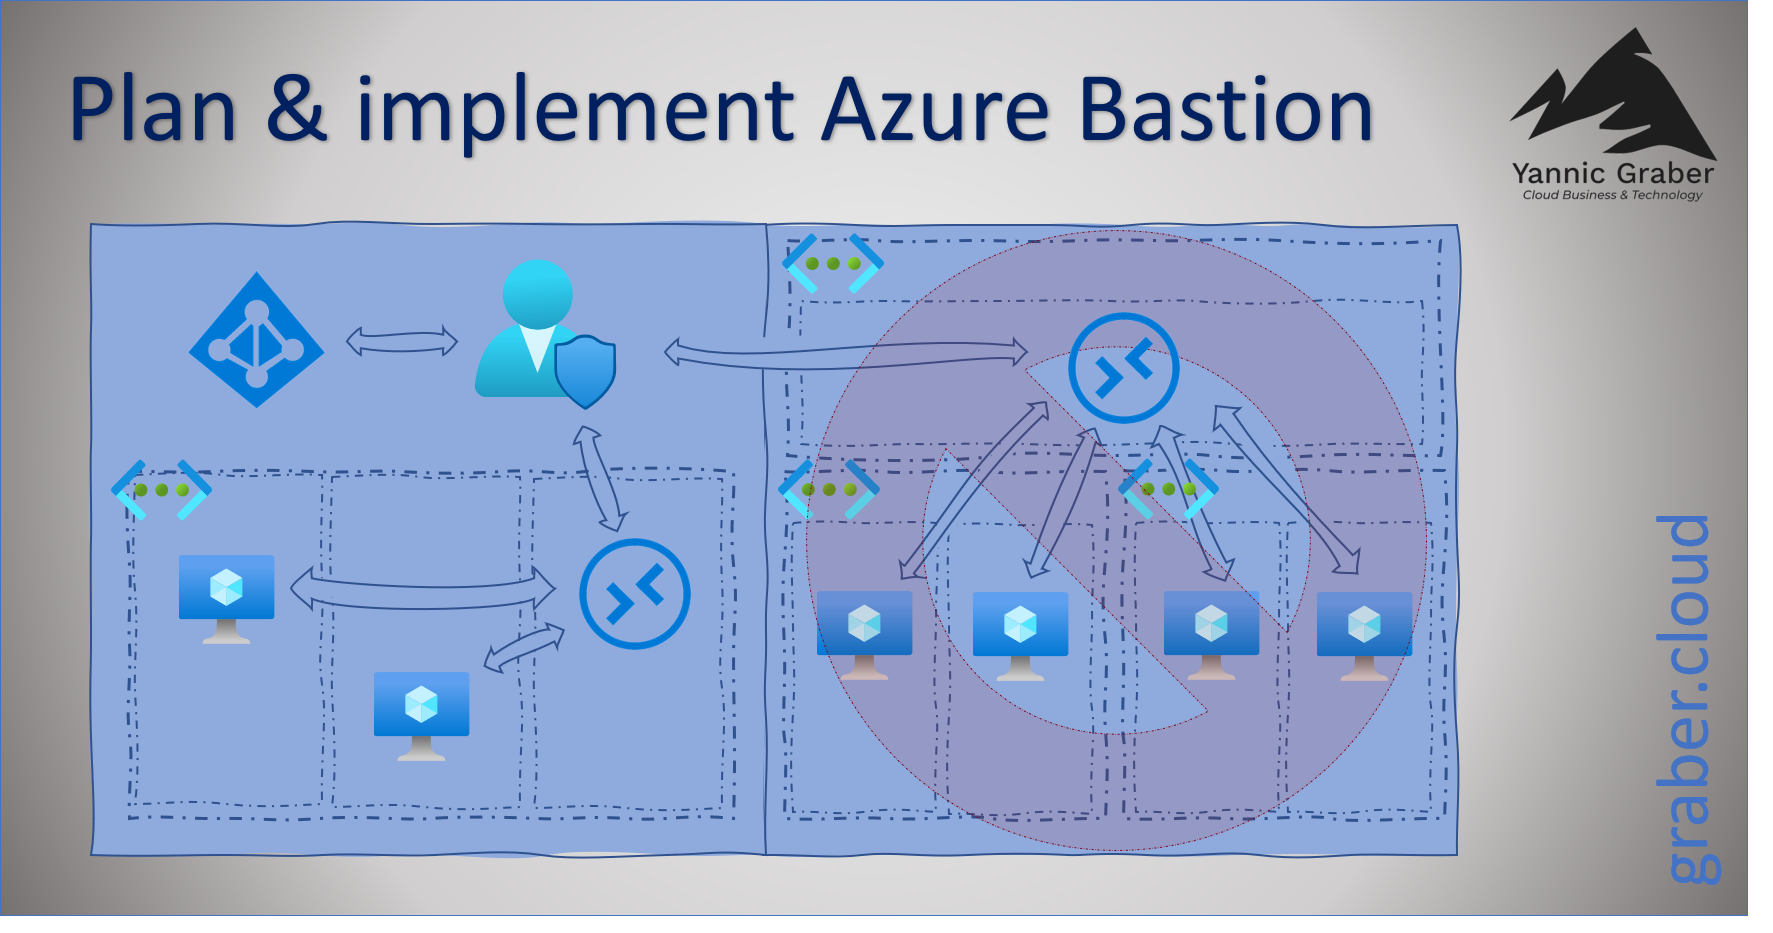
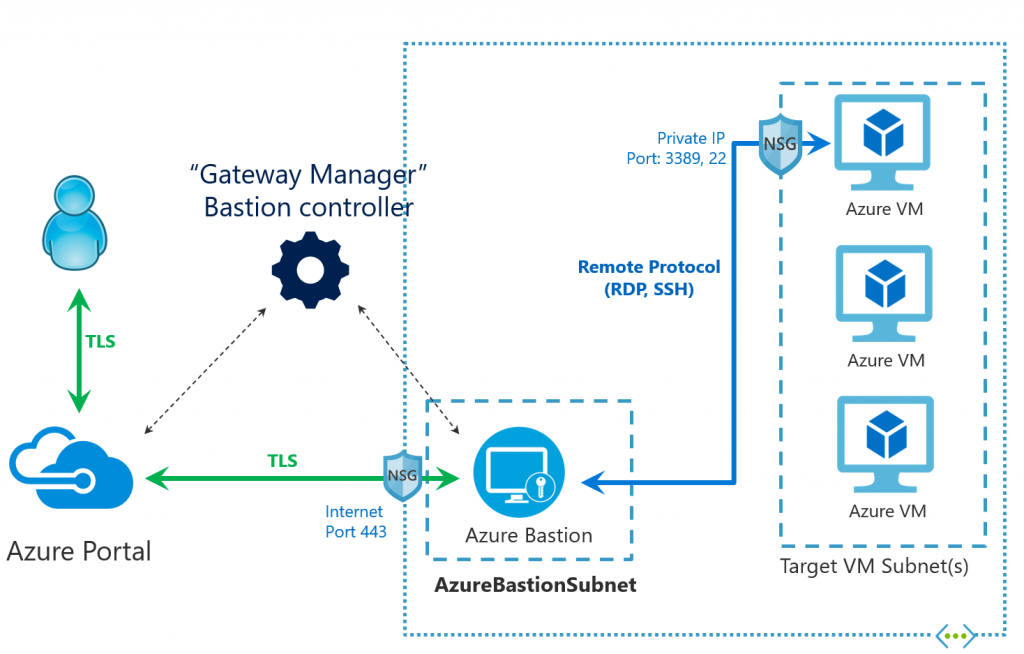
- Azure Bastion only needs to be created once per network. You can then access all VMs on the same network (no matter what subnet they are on), as long as you don't block it via the Network Security Group (NSG).
- At the time of writing this article, the "Hub & Spoke" network architecture is not yet supported. So if you have one, you have to implement one Azure Bastion per network, if you want to access the VMs via the service. However, Microsoft is working to remove this limitation.
- An Azure Bastion must be placed in a separate subnet. According to best practice, no other service should be placed in this subnet. The subnet must be specifically named "AzureBastionSubnet", similar to the Azure VPN Gateway.
- Azure Bastion has theoretically no limitation on concurrent use, since RDP and SSH are both usage-based protocols. However, for "normal use" Microsoft announces in the FAQs that the practical limit for RDP is 25 concurrent sessions and SSH is 50 concurrent sessions.
- Make sure that you choose an appropriate name that also fits into your chosen naming convention.
- Create a concept for the "Network Security Group" permissions. On Azure Bastion you only need to release port 443. Between Azure Bastion and VM, RDP (3389) and SSH (22) must be guaranteed. You will learn more about this later.
Following two examples, an unsupported (right - "Hub & Spoke" network architecture) and a Bastion Best Practice scenario (left).

Implementing Azure Bastion
If you have done the planning conscientiously, you can start the implementation with a clear conscience. It is as simple as possible and takes hardly any time.
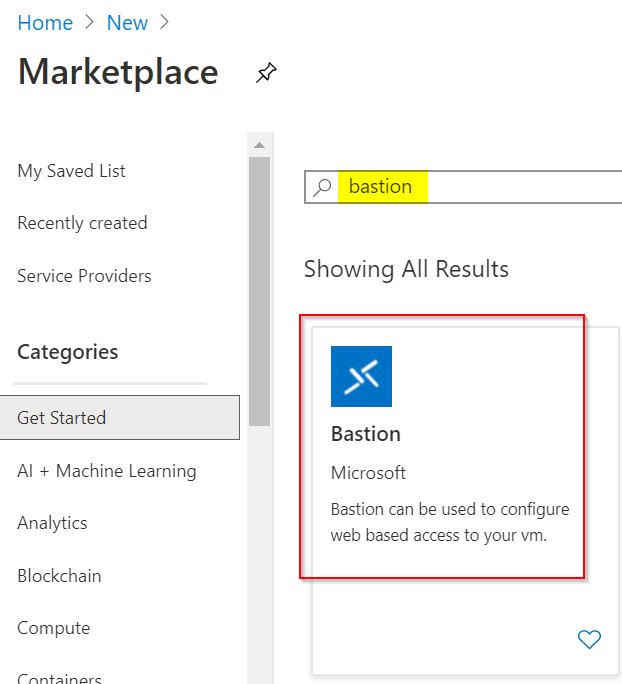
Just search the Azure marketplace for "Bastion".
Fill out the form and select the desired resource group, region, etc. When choosing the network, note that it must contain a subnet named "AzureBastionSubnet" to place the Azure Bastion there. See the red message in the following printscreen. Ideally you have prepared your network before implementation.
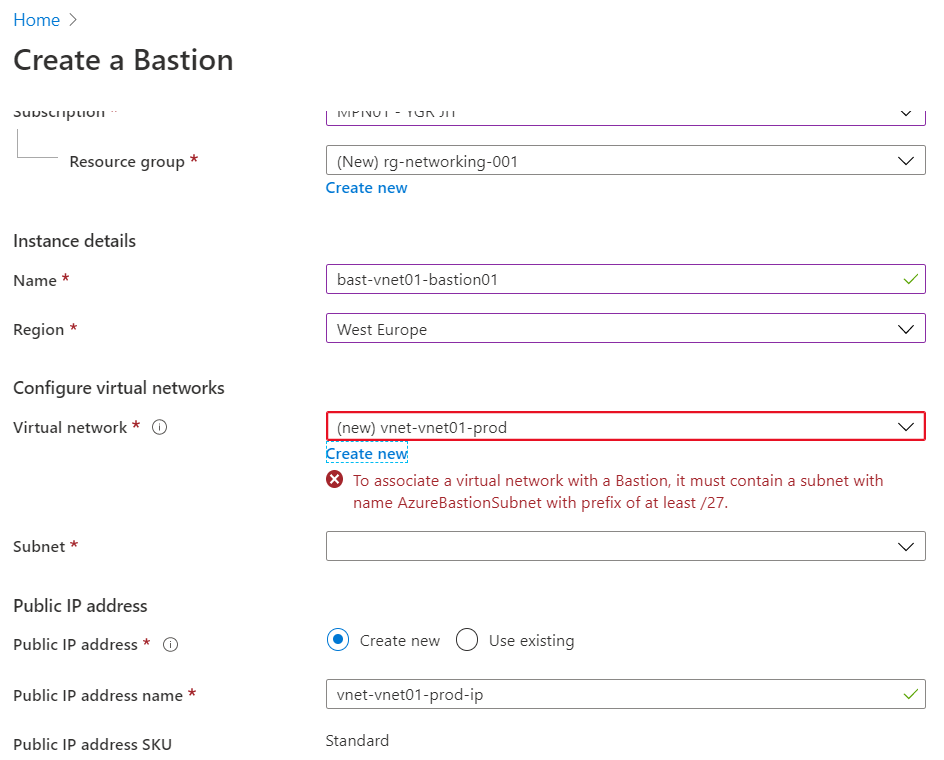
If your network is not yet prepared, it is not tragic. You can also create the necessary subnet directly in the wizard, as the following printscreen shows. It is important that you have considered this in the planning according to the previous chapter.
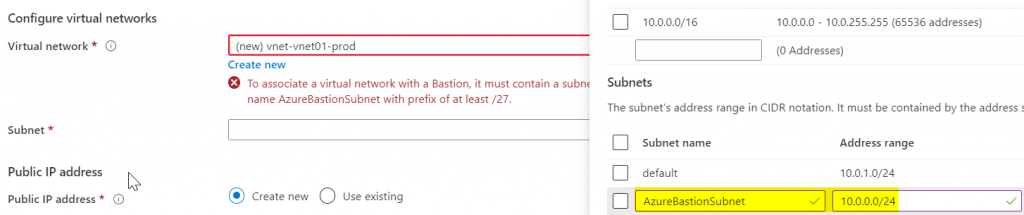
Although the subnet has to be called exactly "AzureBastionSubnet", you will be asked to select the subnet after selecting the network. But since you don't really have a choice there, I assume that this unnecessary step will be removed in the course of time, or that in the future the naming of the subnet will be irrelevant and the information will therefore be requested (improvisation of the author).
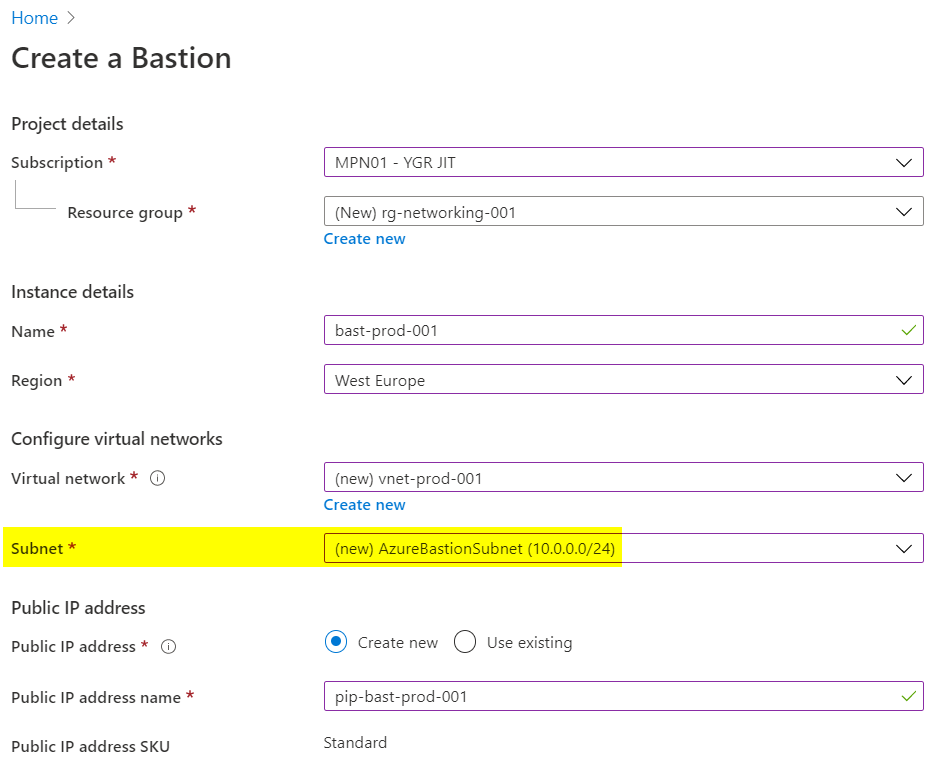
Once you have selected the resource group, region, network and public IP, you can continue, as there are no further configurations to choose during creation. After a short moment Azure Bastion is then basically implemented and functional. But the work is not done yet, because most likely you want to make network restrictions via Network Security Group (NSG).
Configure the Network Security Groups
My recommendation is that you have at least two NSGs. You should place one in front of the Azure Bastion and attach it to the "AzureBastionSubnet". Another NSG should be placed between the Azure Bastion and the VMs, which should already exist, unless it is a completely new network.
My recommendation is that you only open port 443 at NSG before Azure Bastion. You can restrict the source to specific networks (e.g. a VPN and LAN), but I will not do this in this example.
On the second NSG between Azure Bastion and the VMs you have to open port 3389 (RDP) and port 22 (SSH), depending on what you are working with. Open the ports only for the sources Azure Bastion and other private networks if necessary! Your configuration should look like the following scheme.
Access via Azure Bastion
If you landed here, you have successfully implemented Azure Bastion and configured the Network Security Groups accordingly - congratulations. You can now access your VMs via Azure Bastion.
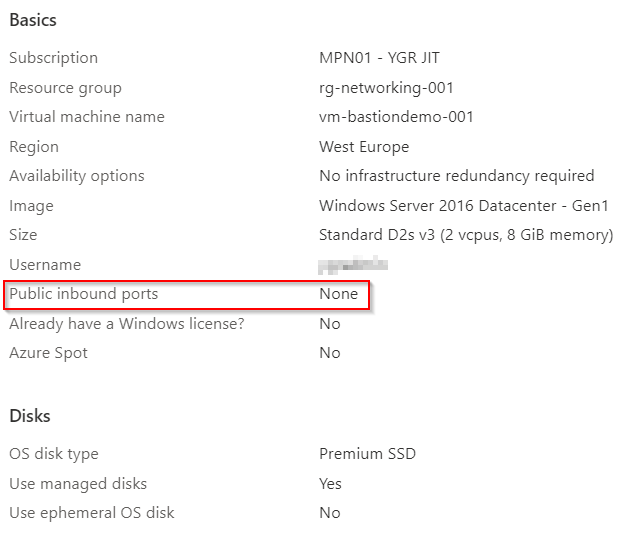
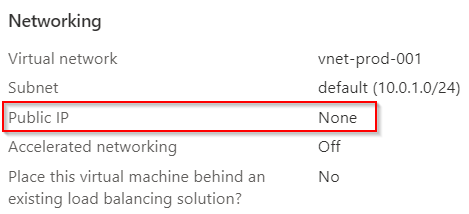
For this example I created a virtual machine with Windows on Azure. To show that no public IP is used by VM. Also no ports are made public, as you can see in the following printscreen. Only Azure Bastion is granted access via port 3389.
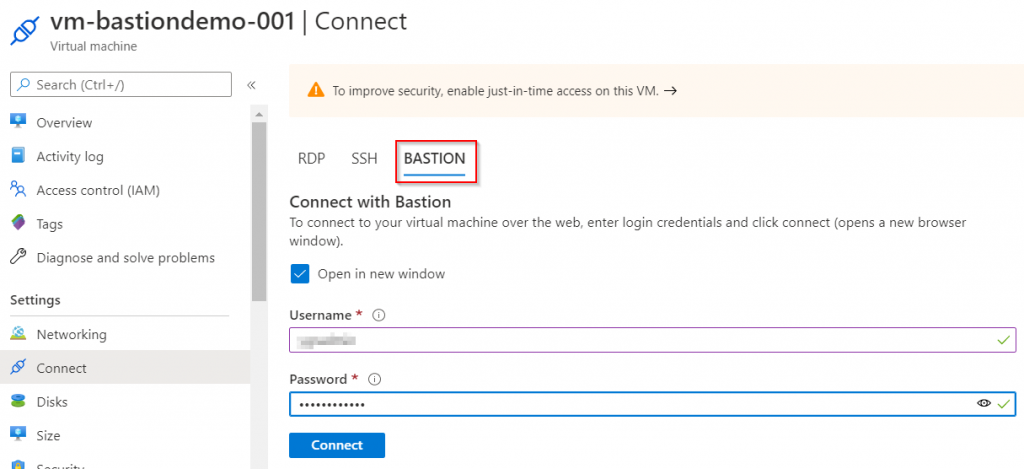
Access is very simple, intuitive and user-friendly. Simply navigate to the desired VM you want to access and select the menu item "Connect" under "Settings". There you will see the option "Bastion". If you select this option, you can dial in with your login information.
Congratulations, you have successfully connected to your Azure VM via Azure Bastion.